I see a lot of people get the same, cheap hygrometers for their growspaces. Having done six grow i've gone through a few of these and found them to be WAY off when it comes to humidity.
I happen to be a hobbyist electronics enthusiast so thought i'd try rolling my own (pun completely intended!).
What you need :
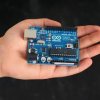
1. An Arduino.

Arduino - HomePage
These are cheap and readily available on Amazon, Ebay etc ...
2. A temperature/humidity sensor.
I use the DHT11, it sense temperature to within 2 degrees and humidity to within 5%, accurate enough for our needs. Available at Amazon, Ebay etc ...

3. A USB AB cable, just like the cable printers use.

The cable is needed so that you can log the data to your PC/Laptop whatever.
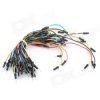
4. Some connecting wires, when you buy an arduino you usually get a few of these.

5. Some breadboard to plug in the DHT11 and connecting wires.
Method.
The DHT11 has 4 pins but, as you can see in the picture above, only three are used, in the following fashion :
1. The VCC pin goes to +3 volts on the arduino.
2. The Data pin goes to one of the Arduino's digital in sockets.
3. The ground pin goes to the arduino ground pin.
Very easy to connect.
The software setup is also very easy, just a matter of copying/pasting some text files to your Arduino directories.
Full instructions can be found here :
Arduino Playground - DHT11Lib
Once it's up and running, the unit outputs the readings every two seconds, these can be accessed via the serial monitor in the Arduino software interface.
This is the unit in operation in my current growbox :
https://www.autoflower.org/f5/grow-...r-one-critical-cheese-26571-3.html#post513197
Since we know it outputs every two seconds, it's easy to put the results in a spreadsheet and get detailed info, rather than just the min/max readings from a cheapy hygrometer.
steely
I happen to be a hobbyist electronics enthusiast so thought i'd try rolling my own (pun completely intended!).
What you need :
1. An Arduino.

Arduino - HomePage
These are cheap and readily available on Amazon, Ebay etc ...
2. A temperature/humidity sensor.
I use the DHT11, it sense temperature to within 2 degrees and humidity to within 5%, accurate enough for our needs. Available at Amazon, Ebay etc ...

3. A USB AB cable, just like the cable printers use.

The cable is needed so that you can log the data to your PC/Laptop whatever.
4. Some connecting wires, when you buy an arduino you usually get a few of these.

5. Some breadboard to plug in the DHT11 and connecting wires.
Method.
The DHT11 has 4 pins but, as you can see in the picture above, only three are used, in the following fashion :
1. The VCC pin goes to +3 volts on the arduino.
2. The Data pin goes to one of the Arduino's digital in sockets.
3. The ground pin goes to the arduino ground pin.
Very easy to connect.
The software setup is also very easy, just a matter of copying/pasting some text files to your Arduino directories.
Full instructions can be found here :
Arduino Playground - DHT11Lib
Once it's up and running, the unit outputs the readings every two seconds, these can be accessed via the serial monitor in the Arduino software interface.
This is the unit in operation in my current growbox :
https://www.autoflower.org/f5/grow-...r-one-critical-cheese-26571-3.html#post513197
Since we know it outputs every two seconds, it's easy to put the results in a spreadsheet and get detailed info, rather than just the min/max readings from a cheapy hygrometer.
steely

 ......can you recommenced one that fits in jars.


