DIY DIY Timelapse Camera : Pi-Lapse

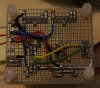
short update today, been making some headway.

pretty much sorted out how this one is happening now ;
2)encoding a bunch of images into a timelapse vid

This will take a while on the Pi, but its going to be on full time so it can turn the shots into timelapse vids as it goes, in the background. ie at the end of each day it can grab the daily images and pull them together into a daily avi file.
so it will be a case of checking the NAS drive that the Pi has put up, and waiting for the next update to magically appear, then we can see the last days progress.
Made a few tests, encoding 100 frames of highest res from the Pi-Cam to 1080p HD avi file took about 7 mins to do, and looks fantastic - the pi cam really is much better than these average webcams.

to encode the file its necc to download and install mencoder ;
sudo apt-get install mencoder

you also need a bunch of stills, all in a folder. run the following cmd to create a text file with a list of them ;
$ls *.jpg > stills.txt

Now mencoder can join them up for you into an .avi file ;

$mencoder -nosound -ovc lavc -lavcopts vcodec=mpeg4:aspect=16/9:vbitrate=8000000 -vf scale=1920:1080 -o test.avi -mf type=jpeg:fps=24 mf://@stills.txt

With that lot proven time to scrap all these functions together into something which starts to work how we need. I've consolidated to having 2 scripts at the moment, one fires very regularly and monitors stuff, sets the lighting in the correct state, the second will handle the capture.
Just finished getting the monitoring script working well tonite, and a locking system so it wont clash when the capture script is running. getting there!
 
something else resolved now ;

id forgotten to consider how im to preview the shot the cameras are getting during setup. so I did a little investigating to see what is possible.
I arrived at a solution with a bit of fiddling around, which works out pretty nice.

motion2.jpg

there is a package called "motion" available to install ;
sudo apt-get install motion

This is quite a clever application and can be set up to do a lot of stuff to do with camera's, timelapse, motion detection, tracking etc etc. looks like it would be a good thing for some kind of advanced security stuff. anyway we only need it for one of its features, ability to serve webcam video over the network. There is some setup needed, modifying of configuration files for the number and name of the cameras you are using. Rather than copy'n'paste all bits of code here I'll find a way later to make the config files available (you'd be able to pull them directly on the pi and put them in the right places).
So motion was setup for the two web-cams , and when I got it right, I could visit a page in firefox from another machine ipaddress:8081 for the first cam , ipaddress:8082 for the second cam.

Took a while longer to figure out how to get the pi camera working in the same way. there is a specific build of motion called motion-mmalcam , it works with the pi-cam. I tried to utilise this vers and get both the webcams running under it (that how it ought to work normally) , but no luck.
Still, this did not matter much, I now start the motion-mmal server to give the pi cam video on port 8081 , and the standard motion server to provide the webcam streams on ports 8082 and 8083.

Now I don't want these streams available all the time, plus they chew up some of the pi's resources. so I enable these servers only when the system has been put in PAUSE MODE. This mode is used when you need to get in there and do something and don't want to be in the timelapse !
It will also work as a setup mode now, so when you enter pause mode, the camera streaming is enabled, and when you return to RUN MODE, the streaming is disabled and stopped.
Took some more tinkering with the monitor script and this now seems to work really well.

I think that's most of the key functions sorted now, few nice to have as well. capture script will take a few days to get right I imagine, almost there. then there was that old idea of getting this thing to pan out by itself. kind of threw out the idea a week back but Its been consuming my thoughts again in the last day or two.

linear slide of some kind... maybe the pi pulls itself up the rail with a little winch driven off a geared stepper?
or thinking a bit laterally .... the undercarriage assembly off a "for parts" RC tank , suitable adjusted drive to allow a very sloooow and accurate movement. (we talking about receding smoothly away from the plant by about 6 foot over about 3 MONTHS !!!!
hmmm...
 
Last edited:
sorry folks been real busy last week or two, hardly been around to do much :(
Have got a few things moving though in the last couple days, now I have the basis of the robot platform for the main cam. this tank-bot is set up to nudge itself backwards by small amounts, so over the grow it will basically back away from the plant to keep it all in shot.
next I will mount another platform on the top where the raspberry pi and its camera will be mounted ( with a couple of servos so it can pan and tilt the camera).
what we have here is the Dagu Rover 5 tank base, and the Dagu 4 channel motor controller connected up to an arduino to control it. the pi will sit above and give some high level commands "move a bit please" every day or other day and the arduino will deal with executing the movement for the bot and its pan/tilt servos.

22.jpg
 
way above my head but i like it! :thumbs:
 
got few more things done on the timelapse robot.
been sorting out the camera's pan/tilt system recently for a start, I've got a couple of servos to use and tried to drive them off the arduino first but was a bit unhappy with the resolution and jitter from the arduino. it can do 8 bit pwm, so 256 steps in the servo range kind of course.

what Ive done is make use of some handy MSP430 USB FET debuggers that I had lying around. This is a 10 buck USB debugger and target microprocessor, handy.
Ive made up a little test board to get that system running, what it does it act like an I2C slave and drive a servo using its hardware timers. This way I have 2500 or 3000 steps in the servo range. This has proved to be a LOT more accurate and precise. This will mean we can make minute, precise adjustments to the camera angle day by day. This system is about 80% up and running. few bits more to tidy up and it'll be ready for the arduino to drive it.

the raspberry pi is still going to be in charge of things, as well as driving all the timelapse functions, its going to tell the arduino robot what to do. basically move position or camera pan or tile angle adjustment.
the pi will plug by USB to the arduino, the usb-serial connection will allow the pi to command the arduino robot.

made up a little diagram of whats going or about to be going on to make it more clear ;

23.jpg
 
trying to get the robot hardware sorted then do some more work with programming it. the top level is now on, the servos for pan and tilt mounted along with brackets etc. then the mast, the pi-camera will go on the end of that.
This will give the camera the height off the floor so its not shooting up at the plant. With the tilt it can come over the edge of a pot when the plant is smaller.
 

Attachments

  • 25.jpg
    25.jpg
    54.7 KB · Views: 76
  • 26.jpg
    26.jpg
    42.6 KB · Views: 63
  • 27.jpg
    27.jpg
    29.4 KB · Views: 92
good news to report peeps, another step closer!
the weekend task was to get the robot arm servo's up and running, and now they are. took an evening or two with a soldering iron and then fiddling around with the coding but now its up and running - im well chuffed :)
Never made a slave device before, that's useful.
Had to write a library for the arduino to program the servo also, another first for me, though that was wonderfully easy, as most things with arduino.
Working with the MSP430 is a bit (lot) more work than the arduino for sure, had to get my head around things again with that. Soldier on with confidence and you get there.
so whats working now.. I can call a library function setServo() command which I built for the arduino, and it will send a message across the i2c interface over to the servo control board. the control board shifts the signal (5V) to 3.3V level for the MSP430's to manage. Both MSP430 have their own address and each control a servo. the msp's pick up the i2c message and set their hardware PWM generator to the specified value. The PWM signal is amp'd back up to 5V and then passed to the relevant servo.


pi ---> arduino ---> servo controller --->servos


this is the chain of command, so everything from the arduino on we are good now. Just the pi that needs to tell the arduino what to do next then the bot is under the pi's ultimate control and I can start finalising and testing few other things and finally sync everything together.
I reckon I'll try and squeeze few things into this week and see how it goes, maybe i'll be ready to start setting this thing up in place the week after.
here's the servo control board, the new addition to the robot frame. managed to keep it tidy and small.
 

Attachments

  • 28.jpg
    28.jpg
    49 KB · Views: 79
  • 29.jpg
    29.jpg
    74.4 KB · Views: 67
The servo controller got strapped onto the robot yesterday and wired in tidily, also mounted the raspberry pi on the top. The original arm I did for the pi camera, I found to be just too heavy to cope with.
Basically when the robot moved forward a step, it was enough to put the servo arm into heavily oscillation. Basically it was not designed to control a very large torque like that. So some major weight reduction in the arm happened. The old steel frame was removed and now the arm is just a piece of balsa wood cut to the size I need and stuck directly on the servo horn. It very lightweight and good rigidity so there is no longer the oscillation problem, and its more than strong enough to cope with the weight of the tiny pi camera board.
Id ordered a longer 50cm ribbon cable for the pi cam last week (standard one is very short!) , so I mount the camera, fed the cables down and into the pi. Now I was able to power back up the pi along with the robot, all good so far. Now back to sorting out the raspberry pi timelapse functions and adding the movement control into it also.
Bit of a detour getting the robot sorted, feels like a while since I last booted the pi! nearly there tho, the grand plan is coming together nicely :)
 

Attachments

  • 30.jpg
    30.jpg
    60.7 KB · Views: 95
298946d1385077092-diy-timelapse-camera-pi-lapse-30.jpg


Bro, you took this from a cool project to an AMAZING one. Seriously; very awesome. Haven't forgotten about this; actually pulled a bunch of gear out from my little workshop to start working on it; then found it on the back burner. Just picked up a powered USB hub though; and my ebay cart is filled with robotic awesome; so please keep sharing; would love to come back to this and give it a go. Absolutely love your instructions and attention to detail; please keep up with the great posts know that we appreciate all the details! Max :slap: , excellent ingenuity!
 
Back
Top