GreenMersh
Just a guy and his dog.
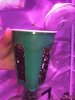
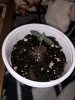
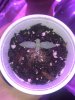
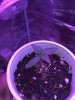
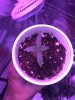
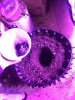
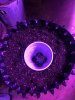
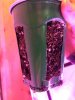
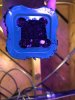
A forgotten Cookies from Mephisto Genetics. I started off by letting the seed soak in a shot glass of Phd water of 6.4 for 18 hours, seed finally sunk and began to crack open, planted the seed in a 16oz solo cup of  Happy frog soil using this instatransplant method I read in a forum on here https://www.autoflower.org/threads/...ictorial-and-root-restriction-stunting.64509/ ( pictures below ) I decided to try the happy frog soil again because after my seedling got a little bit bigger it didn’t seem to bother it on my first grow, I think it may have just been me overwatering, poor draining (Only 1 drain hole in a clay pot ) and pot size, not so much the soil probably. Will just continue to use PhD tap water in a spray bottle while I leave her in the solo cup for about 10 days. I’ll then transplant her to my 3 Gal Air-Pot with happy frog soil as well using this “stress free transplant method” which actually seems pretty fool proof to me. You just sit the entire solo cup in the soil and let the roots grow through the windows on the cup, no pulling the plant out of the smaller pot or cutting the cup getting dirt everywhere. Simply just plant the cup into the soil. She will be under 2x 300w LEDs in my 32x32x65 tent with a 6 inch carbon filter and inline fan. With 2 more small desk fans as well. I’ll be using the fox farm trio Nutrients, grow big, tiger bloom, big bloom. Also Botanicare Calmag and GH ph up and down. Here she is on day 1 trying to shed her seed shell.
Happy frog soil using this instatransplant method I read in a forum on here https://www.autoflower.org/threads/...ictorial-and-root-restriction-stunting.64509/ ( pictures below ) I decided to try the happy frog soil again because after my seedling got a little bit bigger it didn’t seem to bother it on my first grow, I think it may have just been me overwatering, poor draining (Only 1 drain hole in a clay pot ) and pot size, not so much the soil probably. Will just continue to use PhD tap water in a spray bottle while I leave her in the solo cup for about 10 days. I’ll then transplant her to my 3 Gal Air-Pot with happy frog soil as well using this “stress free transplant method” which actually seems pretty fool proof to me. You just sit the entire solo cup in the soil and let the roots grow through the windows on the cup, no pulling the plant out of the smaller pot or cutting the cup getting dirt everywhere. Simply just plant the cup into the soil. She will be under 2x 300w LEDs in my 32x32x65 tent with a 6 inch carbon filter and inline fan. With 2 more small desk fans as well. I’ll be using the fox farm trio Nutrients, grow big, tiger bloom, big bloom. Also Botanicare Calmag and GH ph up and down. Here she is on day 1 trying to shed her seed shell.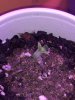


 ppp
ppp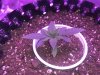

 :smoking: ppp