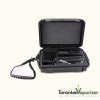
OK folks, time to breathe some life back into this thread. I am madly in love with my Solo & it's my goto vape when I don't have the time to fire up the SSV. While it's not the most portable from the standpoint of sticking it in your pocket, it's definitely something I want to have with me when I travel. Due to the glass components, it really needs some sort of case for protection, and I was not too eager to spend $40+ on the ones premade for the Solo. Here's my solution:
I have a lot of expensive watches, gadgets, handguns, and other items that I need to protect, and for years I've used Pelican cases. A while back I made the switch to Seahorse cases, which are more affordable and offer the same level of protection. These cases can be run over with a car, they're waterproof, airtight/odor proof, and can be locked with a padlock to keep prying eyes out. I have kids and so I need a case that I can throw in the back of the SUV and not have the smell of weed leaking out as well as knowing that my stuff is protected even if it gets buried under piles of family-related junk. I had an extra Seahorse 120 hanging around and decided to make it into a customized case for my Solo. The price fluctuates but they can be had for around $25 in a variety of colors. This is the one I used:
http://www.amazon.com/Seahorse-SE12..._sbs_sg_4?ie=UTF8&refRID=08VA88PZG3VDGX1VP5QV

These cases have customizable foam inserts known as 'pick N pluck'. They're prescored with a grid pattern to make for easy removal when customizing the case. The first step is to plan the layout of the different components.

The Solo main unit will just fit with no space to spare. Time to remove the foam and start 'plucking'!

There are YouTube vids about the different methods, but I find it easiest to pinch the foam. Basically just grab on either side of where you want to tear it and pinch before pulling the pieces apart.

First compartment complete!

Next I measure out and pull a space for the straight glass wand.

Since the foam is a couple of inches thick and the glass wand is much thinner, I now have a compartment that is too deep. The solution is to use a serrated knife to cut the removed piece of foam in half and reinsert it in the hole.

Good to go!

Next we continue on with the bent wand. This needs to sit deeper in the case so I cut a thinner piece of foam to go underneath.

And the last step is to fit the AC adapter & the job is done.

Everything is snug inside and won't move even if you toss the case around. I also heated up the wand on the maximum setting for several minutes and stuck it up against the foam with no ill effects. This solves the problem of what to do with the glass parts when you finish but they're still very hot - I can just stick them right in the case without needing to let them cool. Another tip is to go to the hardware store and get some rubber screw protectors to use as caps for the wands. MFLB owners will recognize these as the same things used for AA battery caps, and that's what gave me the idea.

They fit perfectly on the end of the wand and can be used when the glass is still hot. Great for a load that you didn't get to finish, or if you want to preload a fresh one for later. It also holds in the smell quite well.
Hopefully this has been helpful to some of you Arizer Solo owners out there! Vape on, friends!


